Jerry Wang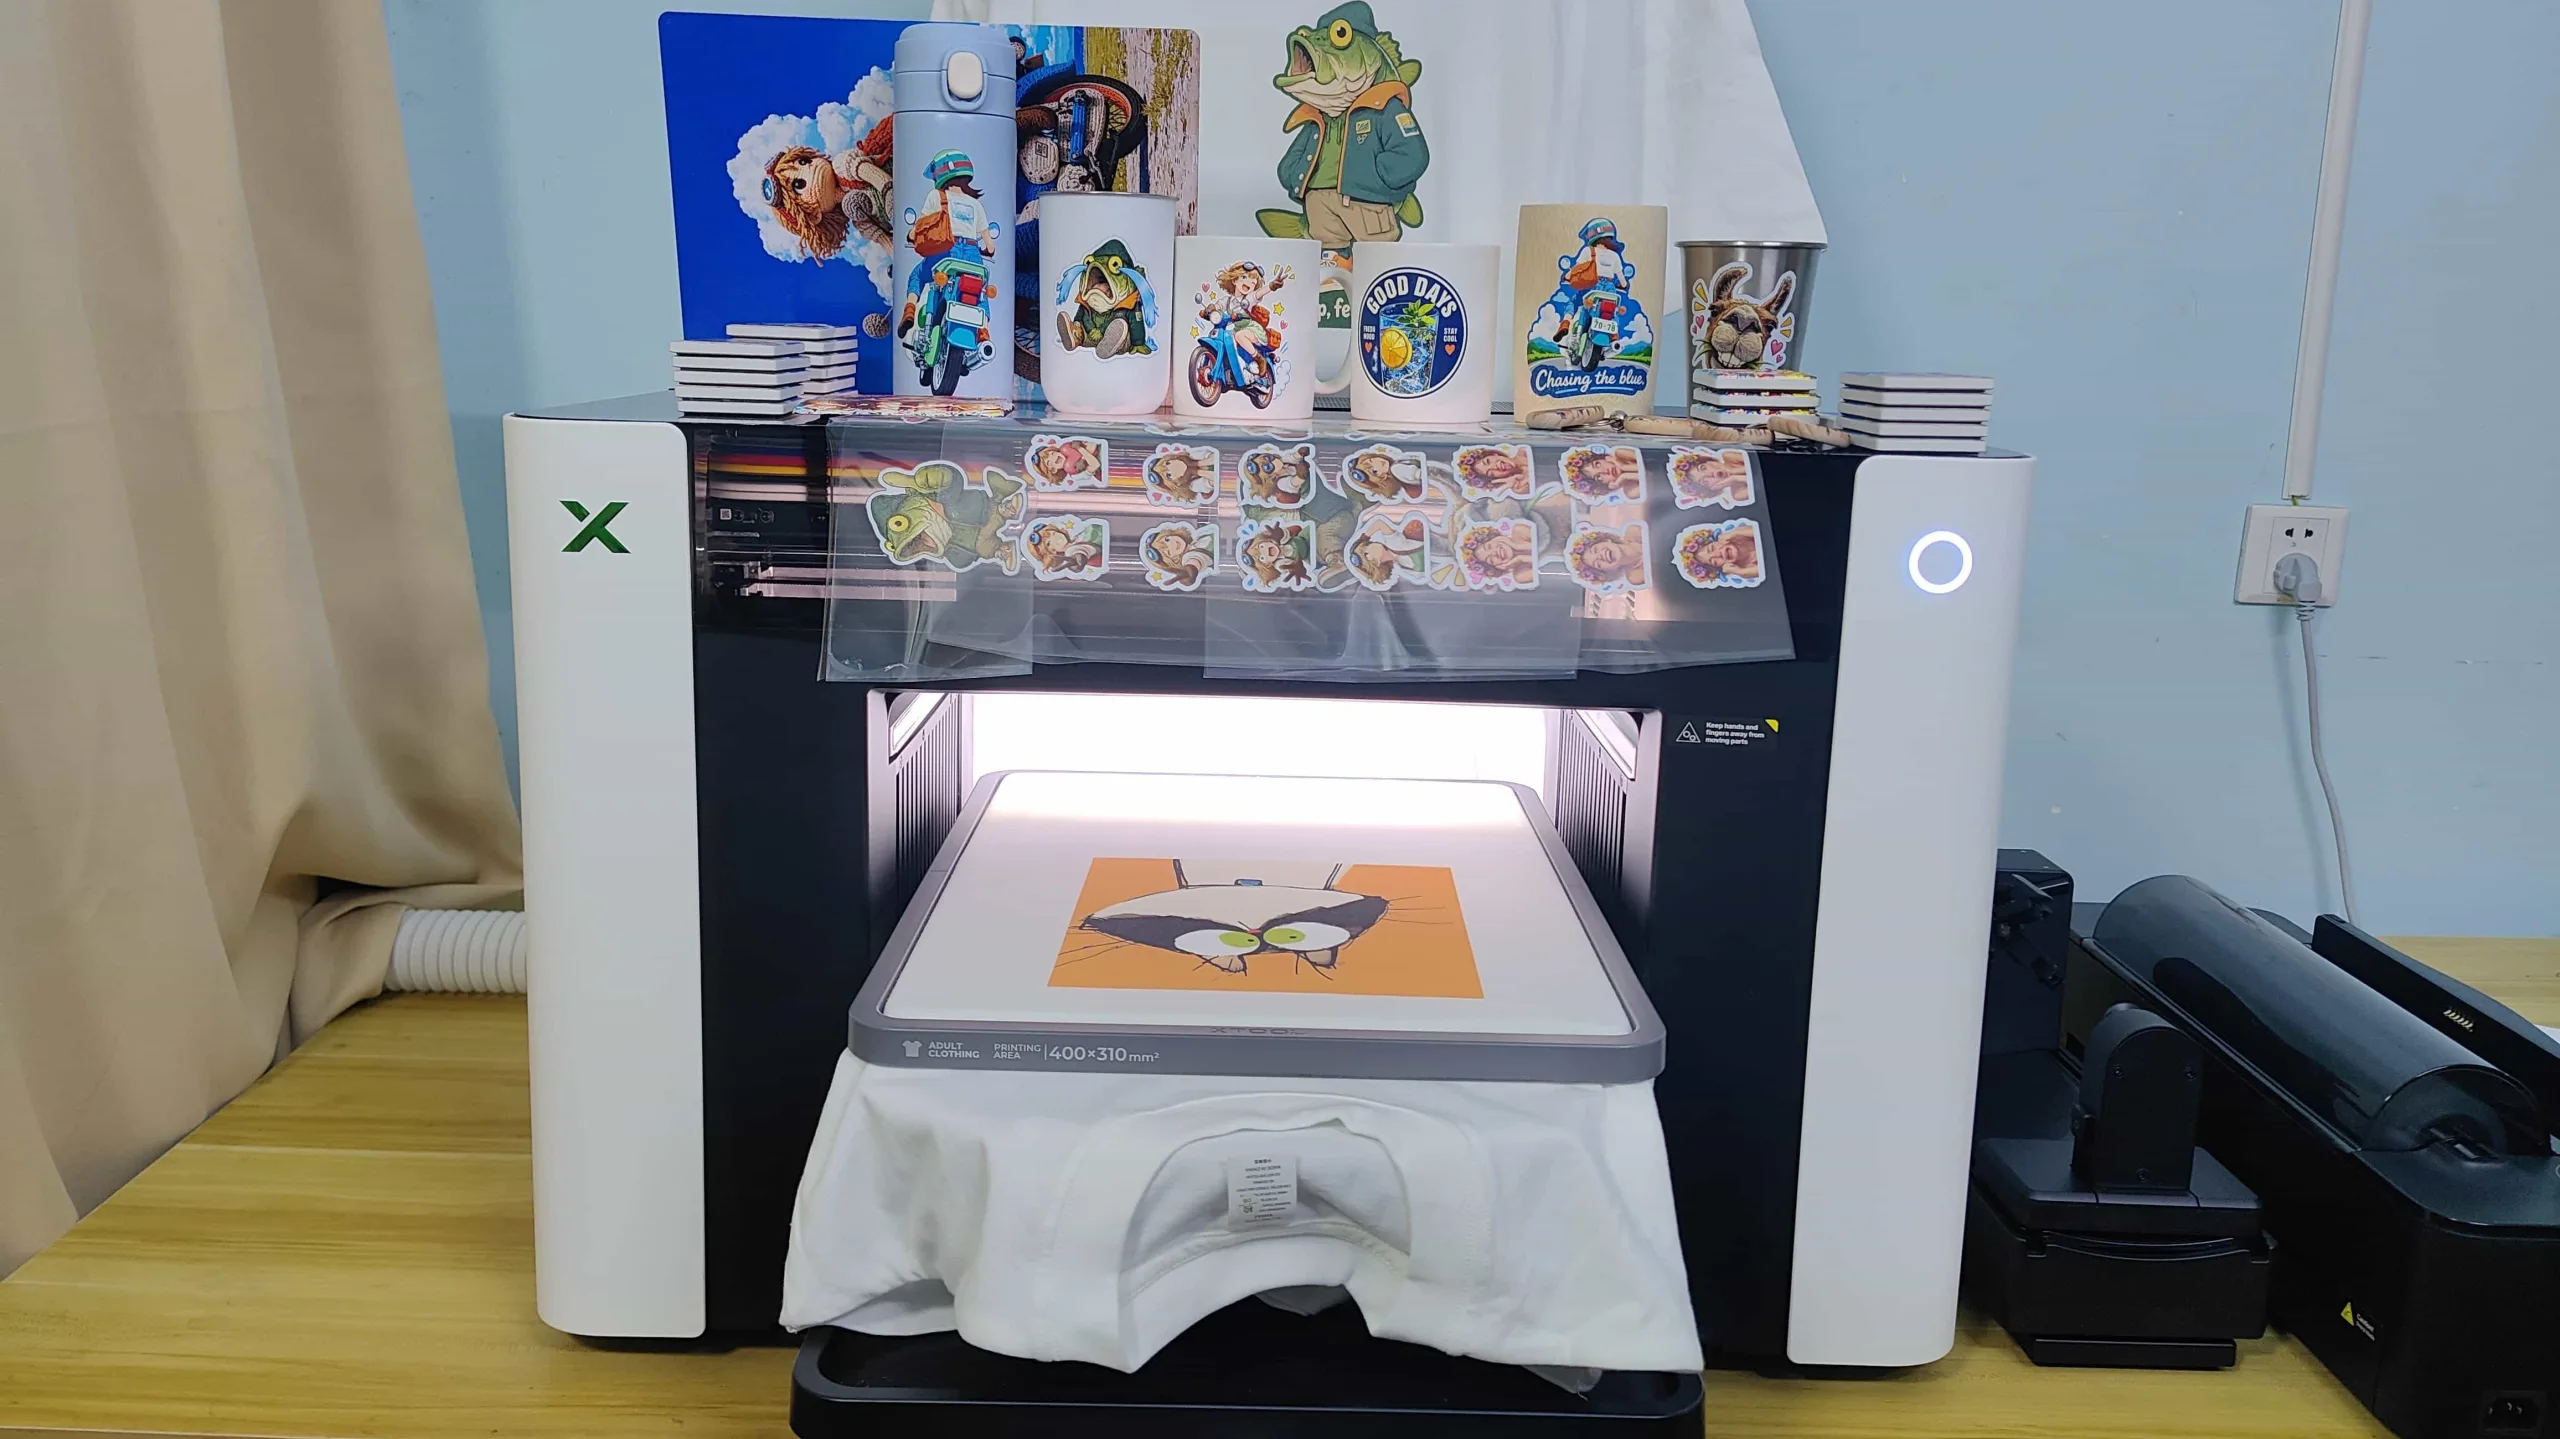
Introduction
For craft businesses and Etsy sellers, scaling production often means buying multiple single-function machines: a dedicated DTG printer or DTF printer for custom apparel, and a bulky UV printer for acrylics, wood, and drinkware. Beyond high startup costs, studio space and daily maintenance quickly become your biggest bottlenecks.
The xTool O1 Omni aims to solve this with a 4-in-1 hybrid architecture combining UV printing, DTG, DTF, and UV DTF sticker printing in one footprint.
To test whether this all-in-one setup delivers commercial-grade output or compromises on quality, I put it through 4 weeks of rigorous stress testing in my studio. Evaluating print precision, workflow, and ink yield, the xTool O1 Omni UV printer earned a solid 4.6 out of 5.0 rating. The xTool O1 Omni’s exceptional material versatility and low barrier to entry make it a powerful production hub.
Whether you are a print-on-demand (POD) entrepreneur looking to maximize margin per square foot or an established maker scaling up custom merchandise, this hands-on guide provides an honest, data-backed look at real print quality, ink consumption costs, and long-term reliability.
Comprehensive Scores of xTool O1 Omni
Summary
The xTool O1 Omni is an all-in-one desktop printing solution that seamlessly combines four core printing technologies—UV printing, Direct-to-Garment (DTG), Direct-to-Film (DTF), and UV DTF sticker production—into a single compact machine. The O1 Omni effortlessly handles everything and is designed for small business owners, crafters, and print-on-demand studios; it lowers startup costs while offering exceptional material versatility, crisp print quality, and a user-friendly software workflow. If you want to expand your custom product catalog without cluttering your workspace, the xTool O1 Omni is one of the most versatile hybrid printing systems on the market.
xTool O1 Omni Design & Build: 4-in-1 Hardware in a Desktop Footprint
For craft business owners and Etsy sellers, scaling production across apparel and rigid custom goods has always presented a real budget and space challenge. The xTool O1 Omni addresses this by integrating four distinct functions—UV printing, Direct-to-Garment (DTG), Direct-to-Film (DTF), and UV DTF sticker transfers—into a single desktop frame. Honestly, consolidating these four printing methods into one compact platform offers substantial savings in both initial equipment investment and studio footprint for small-scale operators.
Inspecting the hardware during unboxing reveals that xTool put genuine engineering thought into making this 4-in-1 hybrid system work. The overall fit and finish feel practical and deliberate, reflecting a clear focus on solving real user space bottlenecks rather than just bundling features together for marketing appeal.


The machine utilizes a clever three-door design that makes it easy to monitor print jobs from multiple angles. During operation, however, both the front and rear access doors must open flat when running large-format UV jobs or DTG apparel passes, as the baseplate moves forward and backward along the Y-axis. This means your workbench requires at least a width of 110 mm (about 4.3 inches). However, the doors feature magnetic latches and detach in seconds, but even with the doors off, keeping that 110 mm width is essential so the print bed can travel without hitting obstructions.

The primary reason this xTool UV printer achieves true 4-in-1 versatility comes down to its multifunctional baseplate system. The main baseplate includes standardized quick-connect interfaces for swapping functional attachments easily. You can snap on a mini baseplate for small UV items, switch to the standard baseplate for larger surface prints or batch UV DTF sticker printing, hook up the OR1 rotary module for drinkware like tumblers and mugs, or mount the garment tray to transform the unit into a dedicated DTG printer for custom cotton apparel.


My test unit is the xTool O1 Omni UV & DT Versatile Bundle, which features a true dual-printhead architecture. Each printhead operates independently with its own dedicated ink lines and capping station, preventing cross-contamination between textile and UV chemistries. The right side of the machine houses the capping assembly for automated moisturizing and waste ink collection, while opening the tool-less magnetic cover on the left side reveals the dedicated air filter compartment.
The xTool O1 Omni makes a strong first impression in build quality and internal layout. The attention to detail during unboxing sets a promising baseline as we move into hands-on print quality and real-world stress testing.
Core Technologies: The Engineering Behind xTool O1 Omni’s 4-in-1 Hybrid System
Behind the xTool O1 Omni’s impressive versatility is a set of proprietary engineering innovations that bridge the gap between rigid material decoration and apparel customization. Rather than combining existing components into a single chassis, xTool redesigned the print engine, optical alignment, and maintenance architecture from the ground up to solve the operational pain points common to traditional industrial desktop printers.
Dual-head All-Rounder: Physical Separation for Cross-Material Printing

The technical foundation of this true 4-in-1 capability rests on a physically isolated dual-printhead and independent fluidics system. In traditional printing, mixing UV-curable resins with water-based textile inks in a single delivery line causes rapid chemical cross-contamination and immediate nozzle clogging. The xTool O1 Omni UV & DT Versatile Bundle solves this by routing UV ink and textile ink through entirely separate ink lines, dedicated printheads, and isolated capping stations. For users choosing the Dual UV configuration, xTool further distinguishes the lines with specialized Hard White ink for scratch-resistant rigid substrates and Soft White ink for flexible, foldable TPU and leather, plus dedicated fluorescent channels for blacklight specialty prints. The core value for creators is complete material freedom—seamlessly transitioning from acrylic keychains and tumbler UV printing to cotton T-shirts and DTF transfers without flushing lines or wasting expensive ink.
Pixel-Scan™ Vision System: Distortion-Free CIS Scanning and Auto-Alignment

To eliminate the most tedious step in UV flatbed printing—building physical jigs and calibrating zero-point coordinates—xTool developed its exclusive Pixel-Scan™ Vision System. Unlike traditional overhead wide-angle cameras that introduce significant optical lens distortion toward the edges of the print bed, Pixel-Scan™ uses a Contact Image Sensor (CIS) mounted directly to the moving gantry alongside a line laser sensor. As the gantry sweeps across the bed, the CIS scans the material line-by-line at close range, generating a 100% 1:1 scale, distortion-free preview map in the software. With an alignment accuracy of up to 0.2 mm, users can literally drop blank substrates anywhere on the bed at any angle; the software automatically scans the outline and aligns the artwork instantly. When paired with the OR1 rotary module, the system even performs a 3D surface scan on cylindrical drinkware to prevent pattern stretch or color skew.
SmartCycle™ 2.0 Low Maintenance: Vacation-Ready Anti-Clogging Architecture
Printhead clogging—especially from titanium dioxide settling in white inks—has long been the primary failure point for both UV printers and DTG printers. The SmartCycle™ 2.0 system addresses this with an upgraded automated maintenance architecture that continuously circulates white ink through internal pumps while in standby mode. Furthermore, xTool introduced a dedicated Two-Week Vacation Mode. Before leaving the studio for an extended break, a single command flushes and seals the lines with a specialized moisturizing fluid. Upon returning, running the automated Wake Up cycle restores the nozzles to optimal printing condition without manual scrubbing or printhead teardown. This dramatically reduces waste ink consumption and eliminates the daily maintenance anxiety that typically plagues small studio operators.
Smart Software Ecosystem: Professional Finishes Made Simple for Beginners
On the software side, xTool Studio streamlines complex industrial Raster Image Processor (RIP) workflows into an intuitive drag-and-drop workspace. Traditionally, creating spot color channels for white underbases, varnish gloss, or 3D embossed textures required advanced manual layering in Photoshop or Illustrator. xTool Studio automates this completely by recognizing image Alpha channels and applying Smart Masking, auto-generating white underlays, glossy topcoats, and 3D tactile relief layers with a single click. The software comes pre-loaded with over 2,000 material preset profiles and includes built-in AI image generation and 3D lenticular effects. This allows beginners to produce high-end, custom-textured goods without needing a steep learning curve in commercial graphic design.
High-Value Bulk Ink System: Lower Cost Per Print for Commercial Scalability
To support profitable small-business production, the xTool O1 Omni replaces tiny, expensive ink cartridges with a high-capacity bulk ink tank system. Formulated with high-concentration pigments and high-adhesion resin binders, the ink delivers vivid color saturation and strong surface durability while requiring lower ink volume per square inch. For Etsy shop owners and print-on-demand businesses, lowering the individual Cost Per Print (CPP) directly boosts net profit margins on custom apparel, sticker packs, and promotional merchandise. Lowering running costs shortens the machine’s overall return on investment (ROI) timeframe, making higher-volume commercial production economically viable for desktop creators.
Hands-On Workflow Experience: UV Printing Tests on Different Materials
After exploring the initial unboxing experience and core technology of the xTool O1 Omni, it was time for hands-on performance testing. I started with standard UV flatbed printing on a natural stone slate.
Thanks to the Pixel-Scan™ Vision System, getting started was completely painless. I placed the stone slate on the print bed and clicked the Scan button in xTool Studio. The software generated a 1:1 scale preview map in seconds. It captured every fine surface detail, including a design I previously engraved with my xTool M2 laser cutter. Just like working with laser engravers, material setup is simple. I selected the stone material preset from the library, and the software automatically configured the optimal UV printing parameters.

Aligning the artwork was equally straightforward using the Smart Mask feature. Clicking the Smart Mask button instantly mapped the exact outline of the stone. I dragged my graphic over the preview, and the software aligned it automatically. From start to finish, the workspace layout felt smooth and simple.

For print finishes, the software offers three modes: Flat, Texture, and Relief. I chose the Relief mode for this test, manually adjusting the relief height from the default 2 mm to 1 mm. Before starting, xTool Studio calculated both the ink cost and production time. The system estimated an ink cost of $1.39 and a print time of 25 minutes for the total area of 12,521 mm².
The final output was impressive in both alignment and color accuracy. Printing this 100 x 100 mm design with a 1 mm raised texture took exactly 25 minutes and cost just $1.39 in ink. The raised details felt crisp, proving how easily this machine handles textured UV flatbed jobs.

The Smart Mask feature works just as well on irregularly shaped items. To test this, I printed four wooden pet tags using Flat mode. The process was fast, taking only 5 minutes in total. The estimated ink cost was just $0.028, making the unit cost extremely low for business production. If you need to batch-produce items, xTool Studio includes a handy batch fill tool. Just like the batch array feature in laser software, it automatically aligns the graphic onto each item at once. You do not need to position every single tag by hand.


Next, I ran two more Flat mode tests: a 100 mm x 100 mm stainless steel plate and a set of ceramic fridge magnets. After completing these initial tests, three clear takeaways stood out. First, the overall workflow is surprisingly simple and smooth. Second, the print speeds are faster than expected. Third, the ink cost per job is low, which means the included ink set can produce a huge volume of custom goods with strong profit margins.
2D Flat, 3D Texture, or 3D Relief? A Guide to xTool UV Print Finishes
The xTool O1 Omni provides three distinct UV printing finishes: Flat, Texture, and Relief. Thanks to built-in AI technology, you only need to upload a single image. xTool Studio then automatically generates all three UV print options for you. This feature gives creators incredible freedom when making custom crafts. However, if you are new to UV printing, choosing between these three effects can feel confusing. To help beginners get started, I will show you how these printing modes differ in practice.
Flat mode prints your image as a smooth, two-dimensional graphic. Just like printing a photograph, what you see on screen is what you get. Flat mode is the fastest option and uses the least amount of ink.
Texture mode uses white ink to build up raised layers before applying color on top. This subtle, raised texture effectively mimics oil paintings or fabric patterns. The xTool O1 Omni can print texture effects up to 3 mm high. Because it stacks multiple ink layers, Texture mode takes longer to finish and consumes more ink than Flat mode.
Relief mode goes a step further by creating a distinct 3D physical structure. The printer repeatedly passes over the bed to stack tens or even hundreds of dense white ink layers. Once this 3D base is built, the printer coats the top with color ink and a clear varnish finish. The O1 Omni supports high-relief printing up to 7 mm. This mode delivers the strongest tactile impact, but it also requires the longest print times and the highest ink consumption.
Now, I am ready to print the same image onto three identical ceramic fridge magnets, each using a different print effect. For both Texture and Relief modes, I set the height to 2 mm and the smoothness level to 1. Let us take a look at how the three results compare.

The image below shows the printing process in progress. On the left, the Flat mode print is already finished. Meanwhile, the middle Texture print and the right Relief print are still running. Looking closely at the three pieces reveals clear differences, especially between the Texture and Relief modes.

The three photos below show the final products for Flat, Texture, and Relief modes. The differences are immediately obvious. Each style brings its own unique look and value. If you need speed and extremely low ink costs, Flat mode is the ideal choice. Personally, I prefer the Relief effect because it feels much closer to 3D printing. By fine-tuning the total height and smoothness settings, you can produce highly artistic, tactile UV prints.


Although I personally prefer the Relief output, Flat mode wins when it comes to fine detail retention. Because Texture and Relief modes build physical 3D layers, some small image details experience minor distortion around the raised or recessed edges. If I had to rank them for detail clarity, Flat mode comes first, Relief comes second, and Texture ranks last. However, when it comes to color accuracy, all three modes deliver excellent performance!
Scaling Up: Large-Format UV Printing with Standard Baseplate

The Mini baseplate has a maximum working area of only 330 x 122 mm. This compact size works best for custom printing single small items. If you want to scale up small-business batch production or print larger artwork, you will need to switch to the standard baseplate. Swapping the baseplates is fast and effortless. The standard baseplate uses magnetic mounts and press-lock buckles, allowing you to swap it out in just 3 seconds. With a larger working space of 330 x 420 mm, the standard baseplate is ideal for creators producing large-scale projects or batch-printing small goods like fridge magnets.

I planned to print a wall art piece on an A4-sized (210 x 297 mm) plywood sheet to test the stability and print quality of the xTool O1 Omni over large surface areas. To make the artwork unique, I used an AI creation tool on the Atomm online community to convert my image into a Crochet Pattern style. xTool’s software ecosystem is truly impressive. Atomm offers over a hundred AI generators, giving small-business creators immense flexibility.
Thanks to the Pixel-Scan™ Vision System and the Smart Mask feature, prep work went smoothly as usual. I selected Flat mode for this test. Because plywood has a natural grain, I applied 5 layers of white ink as a primer to fully mask the wood color beneath. I then added 1 color layer and 1 coat of matte varnish on top. Completing this A4-sized wall art took about 45 minutes, with an estimated ink cost of just $1.48. This makes the running cost extremely reasonable for business production.
The final print quality was nothing short of perfect! The machine captured every fine detail and matched the original colors with 100% accuracy.

xTool OR1 Rotary Test: UV Printing on Tumblers, Mugs with Handles & Drinkware
My flatbed tests with the xTool O1 Omni were extremely satisfying. From small items to large art pieces, the machine delivered impressive color consistency and stable print performance. Next, I tested UV printing on tumblers, ceramic mugs, and other drinkware. Naturally, this process requires a rotary attachment, and my bundle included the OR1 rotary module.

Installing the OR1 rotary module onto the main baseplate took only a few seconds. The setup is simple and hassle-free, allowing you to jump straight into design and printing.
The OR1 rotary module can hold cups with a maximum diameter of 100 mm, making it compatible with almost all standard drinkware on the market. I used a ceramic mug with a handle as my real-world test subject to show how the xTool O1 Omni handles custom drinkware printing.


Just like flatbed UV printing, the rotary workflow is smooth and beginner-friendly. xTool Studio provides 3D modeling presets for various cylindrical objects. Clicking the Modeling button opens the setup guide. Since my mug has a standard cylindrical body with a handle, I simply selected the matching option. The exclusive Pixel-Scan™ Vision System then scanned the mug from all angles to create a precise 1:1 3D model.

If you have ever calibrated traditional UV rotary setups, you know how tedious avoiding handle collisions can be. Here, the system accurately detected the exact position of the mug handle, calculating both the printable and non-printable zones automatically. I wanted a subtle 3D texture, so I selected Relief mode with a height of 0.3 mm and a smoothness level of 8. The software preview was precise, giving me full confidence before hitting start.
The final output was fantastic! The 0.3 mm raised texture added a high-end, tactile feel, and the UV ink bonded strongly to the ceramic surface without needing any liquid primers. Of course, if you are printing on smooth glass or heavily glazed ceramic mugs, I recommend applying a surface primer beforehand to improve ink adhesion.
Printing this custom mug took only 18 minutes, with an estimated ink cost of just $0.15 (based on automatic calculations in xTool Studio). Considering a blank mug costs around $1.50, selling a custom relief mug for $18 to $25 on Etsy yields an incredible profit margin for small businesses.

To test material versatility, I printed three more cylindrical items: a bamboo pen holder, a stainless steel insulated tumbler, and another ceramic mug. In total, custom printing all four drinkware items used less than $0.30 in ink, proving how cost-effective this setup is for daily production.

UV DTF Transfer Sticker Production: xTool O1 Omni & LM1 Laminator
While direct UV flatbed printing works wonders on flat substrates and regular drinkware, large or unusually curved items—like motorcycle helmets, equipment cases, or highly contoured mugs—often cannot physically fit inside the machine chassis. To solve this limitation, I ran a hands-on test of UV DTF sticker printing using the xTool O1 Omni. This process creates high-adhesion, 3D raised glossy UV stickers that allow you to peel and stick custom graphics onto virtually any hard, irregular surface.

My xTool O1 Omni UV & DT Versatile Bundle came with the xTool LM1 Laminator. This unit is an essential accessory for UV DTF sticker production, as it laminates Film B over the UV-printed graphics on Film A using heated pressure rollers.
In short, batch-producing peel-and-stick UV decals with the O1 Omni requires three core elements: Film A sheets, Film B rolls, and the xTool LM1 Laminator. Once you turn on the heat function and thread the Film B roll into the laminator, pre-setup is complete, and you are ready to print your graphics onto Film A.
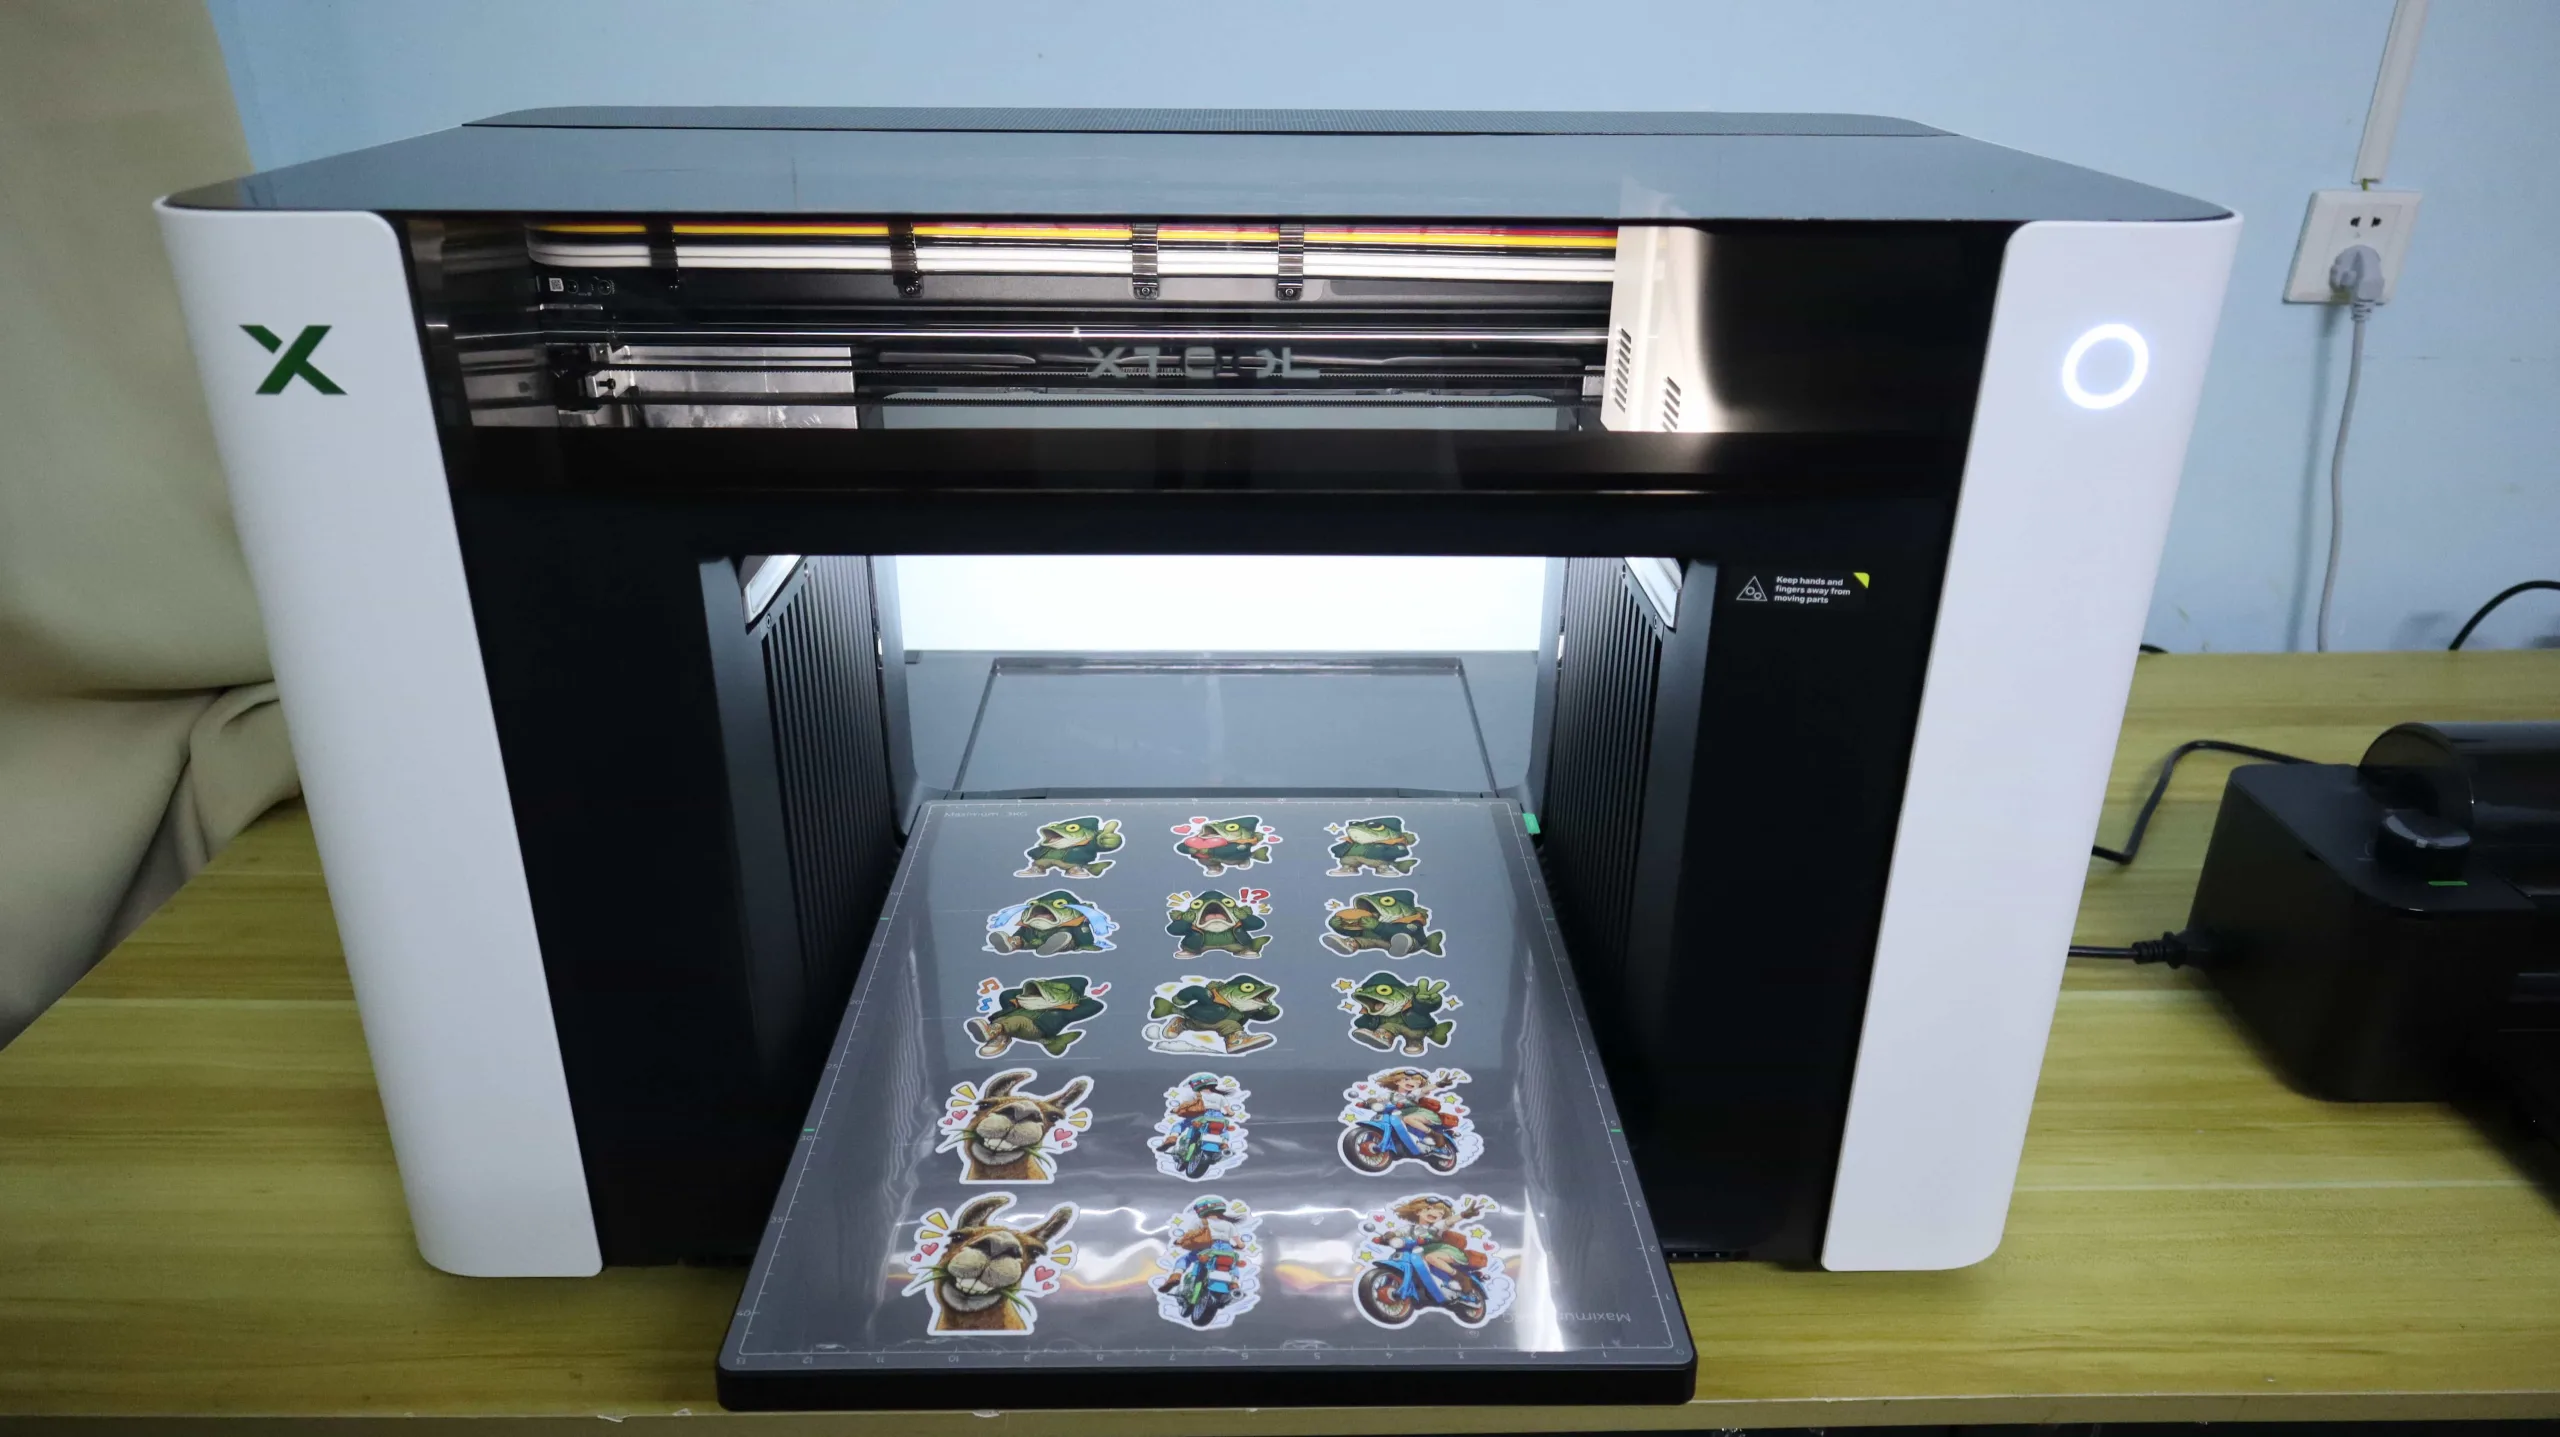
To start, lay Film A completely flat on the standard baseplate with the release paper facing up. Film A consists of three distinct layers: the top release paper (which protects the sticky gel), the middle adhesive layer (where the ink actually prints), and the bottom base film.

Carefully peel away the top release paper. Take extra care not to disturb the double-sided adhesive layer so that it stays firmly bonded to the base film beneath.
With Film A prepped, you can launch large-format UV DTF transfer sticker jobs immediately. The software setup is identical to standard flatbed UV printing—fast, simple, and beginner-friendly.


After printing, feed the printed Film A directly into the xTool LM1 Laminator. The sensor automatically detects the incoming sheet, and the motorized heated rollers press Film B tightly over the printed Film A graphics. Just like that, your custom 3D raised glossy UV stickers are complete.

Applying the decals is quick and straightforward. Trim out your individual decal, peel back the bottom base film to expose the strong adhesive layer, and press the sticker onto your substrate. Next, use a squeegee from the center outward to smooth out air bubbles and force the adhesive to bond tightly with the surface. Finally, peel away Film B to reveal a crisp, scratch-resistant waterproof transfer sticker.

How does the process feel in real-world testing? The workflow was far simpler than I expected! xTool’s A3-sized Film A sheets and Film B rolls make small-business batch production exceptionally fast and efficient. To test ink yield and cost efficiency, I ran two A3 Film A sheets containing 57 decal graphics. The entire job took 80 minutes, with a total estimated ink cost of just $0.58 (based on automatic calculations in xTool Studio)—averaging only $0.01 per sticker! The print stability, color accuracy, and alignment precision were flawless from edge to edge.
If you want to see the complete workflow in action, check out our step-by-step guide on how to make custom UV DTF stickers using this machine and the xTool LM1 laminator.
DTG T-Shirt Printing with xTool O1 Omni & Garment Tray
While UV DTF sticker production solves the challenge of customizing hard, irregular items, expanding a print-on-demand (POD) business often requires stepping into the lucrative world of custom apparel. Traditionally, adding t-shirt printing meant investing in a standalone Direct-to-Garment (DTG) printer—costing thousands of dollars and taking up valuable studio floor space. This is where the xTool O1 Omni’s 4-in-1 hybrid architecture truly shines. By simply swapping out the flatbed baseplate for the dedicated garment tray, the machine transforms into a compact, desktop DTG printer for cotton T-shirts and fabrics.

When equipped with the dedicated Garment Tray, the xTool O1 Omni offers a generous maximum Direct-to-Garment (DTG) print area of 300 x 390 mm. Notably, the Garment Tray package includes two specialized pretreatment liquids—one formulated for light-colored cotton and another for dark cotton garments—which help textile inks bond deeply into the fabric fibers.
To complete a professional DTG apparel printing workflow, a heat press is essential for both smoothing out fabric wrinkles and curing the printed ink. For my tests, I used the xTool Heat Press, a unit I previously evaluated in my studio. If you purchase the xTool O1 Omni DT + UV Print and Press Deluxe Bundle, it comes fully equipped with all the necessary accessories for 4-in-1 production, including the heat press.
The DTG printing preparation workflow on the xTool O1 Omni is surprisingly straightforward. Using my custom white cotton T-shirt project as an example:
- Pre-Pressing: I placed the blank shirt on the heat press at 150°C (302°F) for 1 minute to remove moisture and flatten the fabric completely.
- Applying Pretreatment Primer Liquid: Next, I sprayed an even layer of light-garment pretreatment liquid over the print area to act as a primer for the textile ink. If you are customizing black or dark-colored garments, you would simply switch to the dark-garment pretreatment liquid instead.
- Drying the Pretreatment Primer Liquid: To set the liquid into the cotton fibers, I returned the shirt to the heat press, applying 50 kg of pressure at 150°C for 180 seconds. With that, the pre-treatment phase was complete—much easier than I had anticipated.
- Printing Setup: I secured the pretreated shirt onto the Garment Tray, loaded my graphics into xTool Studio, used the automatic alignment tools, and launched the print job.


The print speed was impressively fast. I customized two white cotton T-shirts: the first shirt featured a 188 x 188 mm graphic that took 9 minutes to print with an estimated DTG ink cost of $0.44, while the second shirt featured a 160 x 210 mm design that finished in just 8 minutes with an ink cost of $0.25 (based on automatic calculations in xTool Studio).


Fresh out of the printer, the wet textile ink requires careful handling, so I allowed it to air-dry for about 3 minutes before performing the final thermal curing step using the xTool Heat Press set at 150°C for 3 minutes.
The final results were truly stunning, matching retail quality! Thermal curing fused the textile ink permanently into the cotton fibers, leaving behind a soft, flexible print that resists cracking even when folded or stretched. The color accuracy and resolution were completely spot-on.

If you are concerned about color distortion when printing on dark or black cotton shirts, the xTool O1 Omni’s software and print setup eliminate this issue entirely. For dark garments, the printer automatically applies one or more white ink underbase layers before spraying CMYK color inks, completely blocking the shirt’s background color to ensure vibrant, true-to-life prints.
Having tested all four modes of the xTool O1 Omni—UV flatbed, OR1 rotary, UV DTF stickers, and DTG apparel printing—I am thoroughly impressed by what this desktop workstation can accomplish!
xTool O1 Omni Pros & Key Considerations
Before making an investment in a commercial desktop printing hub, weighing the real-world advantages against operational requirements is essential for long-term business success. Here is a realistic breakdown of the xTool O1 Omni’s core strengths and key considerations:
Pros: What Makes the xTool O1 Omni Stand Out
- True 4-in-1 Versatility: Seamlessly handles UV flatbed, OR1 rotary drinkware, UV DTF transfer stickers, and DTG apparel printing within a single compact footprint.
- Beginner-Friendly Intelligent Workflow: Streamlines commercial printing with one-click Smart Mask alignment, automatic depth sensing, and hands-off zero-point calibration—eliminating the need for manual jig construction.
- Thriving Creative & AI Ecosystem: Direct integration with the Atomm community and xTool Studio’s built-in AI tools provides access to hundreds of ready-to-print design templates, AI graphic generators, and preset material profiles for rapid product development.
- Zero Cross-Contamination: Physically isolated dual-printhead design prevents chemical mixing between textile and UV inks, ensuring long-term nozzle reliability.
- Pixel-Scan™ Automated Alignment: CIS optical scanning generates 1:1 distortion-free preview maps with up to 0.2 mm positioning precision.
- Exceptional Cost Efficiency: Unmatched bulk-ink running costs—averaging just $0.01 per UV DTF sticker and $0.25 to $0.44 per custom DTG t-shirt.
- Vacation-Ready Maintenance: SmartCycle™ 2.0 automatic white ink circulation and Two-Week Vacation Mode prevent nozzle clogging during studio downtime.
Key Considerations Before You Buy
- Essential Companion Hardware: To fully unlock the 4-in-1 ecosystem, you will need a dedicated heat press (like the xTool Heat Press for DTG curing) and a laminator (like the xTool LM1 for UV DTF stickers). Purchasing the Deluxe Bundle is highly recommended to acquire all necessary attachments at once.
xTool O1 Omni Version Comparison: Single UV vs. Dual UV vs. UV-DT
Choosing the right xTool O1 Omni configuration comes down to your primary production focus—whether you specialize in rigid item decoration, high-end optical textures, or a hybrid mix of hard craft goods and custom apparel. xTool offers three distinct hardware configurations with fixed ink setups:
Full Version Capability Matrix
| Feature / Capability | Single UV (Starting at $2,499) | Dual UV (Starting at $3,299) | UV-DT (Starting at$3,499) |
| Best Target Use Case | Entry-level hard-surface customization | Advanced UV special effects & luxury finishes | Most versatile: Rigid goods + fabric & apparel |
| Printhead Config & Inks | 1x XP600 Head (CMYKWV) | 2x UV Heads (Adds Soft White & Fluorescent) | 1x UV Head + 1x DT Fabric Head |
| Rigid Surface Printing (Wood, Acrylic, Metal, Tumblers) | ✅ | ✅ | ✅ |
| Texture Printing Speed | Medium | Fastest | Medium |
| Hard White Ink (Scratch-Resistant Adhesion) | ✅ | ✅ | ✅ |
| Soft White Ink (Flexible TPU, Leather, Canvas) | ❌ | ✅ | ❌ |
| Specialty Inks (Fluorescent Red & Yellow) | ❌ | ✅ | ❌ |
| Direct-to-Garment (DTG) (Cotton T-Shirts, Hoodies) | ❌ | ❌ | ✅ |
| Direct-to-Film (DTF) (Film Transfers for Fabrics) | ❌ | ❌ | ✅ |
| UV DTF Stickers, Gold Foil & Rotary (With Accessories) | ✅ | ✅ | ✅ |
Which Version Should You Choose?
- Single UV: The budget-friendly entry point for crafters working exclusively on rigid substrates like acrylic keychains, wooden signs, ceramics, and tumblers.
- Dual UV: Built for high-end UV specialists. The dual UV printheads unlock the fastest 3D texture throughput, soft white ink for flexible leather/canvas, and high-impact fluorescent color effects.
- UV-DT: The ultimate 4-in-1 hybrid workstation for print-on-demand (POD) creators. By combining dedicated UV and textile fluidics, it allows you to print on hard goods and full-color cotton apparel without needing separate machines.
Final Verdict: Is the xTool O1 Omni Worth It for Your Craft Business?
If you are scaling a craft studio or print-on-demand (POD) business, the xTool O1 Omni is hands-down one of the most versatile investments you can make in 2026. By successfully consolidating four core printing technologies—UV flatbed printing (which includes OR1 rotary processing), Direct-to-Garment (DTG), Direct-to-Film (DTF), and UV DTF transfer stickers—into a single compact platform, it eliminates the need to buy multiple single-function machines that cost thousands of dollars and overcrowd your studio space.
This versatile hub is tailored specifically for creators who need real production agility. Whether you are an Etsy merchant scaling high-margin catalogs without outsourcing fulfillment, an existing laser owner looking to jump from single-color engraving to full-color graphics, or a local boutique taking B2B merchandise orders, the O1 Omni seamlessly adapts to your workflow. Independent artists and IP holders can also turn digital graphics into premium tactile merchandise with impressive color accuracy and durability.
From a business ROI perspective, the O1 Omni excels where traditional desktop setups often fail: running cost efficiency. Batch-producing UV DTF transfer stickers costs just $0.01 per decal on average, while full-color DTG t-shirt prints range between $0.25 and $0.44 in textile ink. When a custom relief mug or personalized cotton t-shirt easily commands $20 to $30 on creative marketplaces, these generous margins allow small operators to achieve a remarkably quick payback period.
Ultimately, for crafters looking to maximize revenue per square foot of studio space, the xTool O1 Omni delivers commercial print quality, rock-solid color precision, and effortless daily production. It earns a well-deserved 4.6 out of 5.0 stars and my highest recommendation for small-scale custom manufacturing.

xTool O1 Omni FAQs: Maintenance, Ink Costs & Buyer Questions
Q1: Can the xTool O1 Omni sit idle for weeks without printhead clogging?
Yes. Unlike traditional UV printers that require daily manual flushing, the xTool O1 Omni features SmartCycle™ 2.0. When kept plugged in, it automatically stirs white ink and circulates protective fluid. If you are stepping away for holidays or studio downtime, engaging Vacation Mode protects the printhead dampers for at least 14 days without ink drying out or wasting expensive cartridges.
Q2: Can I use third-party UV or DTG inks in the O1 Omni?
No, third-party inks are not recommended or supported. The xTool O1 Omni operates on a closed-cartridge system specifically calibrated with xTool’s official ICC color profiles, fluid viscosity standards, and printhead waveforms. Using third-party inks risks color inaccuracy, severe nozzle clogging, damper degradation, and voiding printhead warranty coverage.
Q3: Do I need third-party RIP software (like PhotoPrint or CadLink) to run the printer?
No. The printer runs seamlessly through xTool Studio, which includes native color management, automatic vector layout, 3D relief layer generators, and Atomm AI design suites. You do not need to purchase expensive external RIP software, making it far easier for beginners to get started right out of the box.
Q4: Why is pretreatment solution required for Direct-to-Garment (DTG) t-shirt printing?
Pretreatment solution is essential for high-quality DTG printing because it acts as a cross-linking agent between the fabric fibers and water-based textile ink. Here is why it is used and how it differs by garment color:
- Core Purpose of Pretreatment: It seals cotton fibers to prevent liquid ink from soaking too deep into the fabric, boosts color vibrancy, maximizes ink adhesion, and prevents graphics from fading or cracking after multiple machine washes.
- Dark Cotton Shirts: Require Dark DTG Pretreatment to form a smooth surface barrier that prevents heavy white underbase ink from sinking, ensuring bright, solid white layers beneath CMYK colors.
- Light/White Cotton Shirts: Require a light layer of Light DTG Pretreatment to lock CMYK ink drops near the surface, delivering crisp detail, accurate color reproduction, and maximum wash durability.
Q5: What extra companion hardware do I need to fully unlock the 4-in-1 functions?
While the base machine handles UV flatbed jobs directly, unlocking the full ecosystem requires two essential workflow companions:
- Heat Press (e.g., xTool Heat Press): Required to cure DTG textile ink into garment fibers and finalize DTF transfer film application.
- Hot Laminator (e.g., xTool LM1): Required to apply the transfer film (Film B) onto printed UV DTF sticker sheets (Film A).
Q6: How much studio depth clearance does the xTool O1 Omni actually require?
While the machine body occupies a compact footprint on standard workbenches, processing long garments (DTG mode) or large-format UV boards requires opening the front and rear extension pass-through doors. Make sure to reserve at least 110 cm (43.3 inches) of total depth clearance to allow free movement during full-size Y-axis print passes.
Q7: What is the estimated printhead lifespan and replacement cost?
In active commercial print studios, UV and textile printheads are considered standard consumables with an expected service life of 6 to 12 months depending on volume and maintenance. Should a printhead require replacement down the road, official xTool replacement heads are designed for user-friendly swapping without requiring a technician call-out.
Q8: Is the xTool O1 Omni a laser engraver, or does it only print?
The O1 Omni is purely a full-color UV and fabric printer, not a laser cutter. However, it seamlessly syncs with xTool laser engravers (like the M2, S1, or P2) through xTool Studio software. You can print full-color graphics on the O1 Omni first, then pass the item directly to your xTool laser to cut exact contours without losing alignment calibration.
Q9: Do I need an external fume extractor or room ventilation for indoor printing?
While UV and DTG inks are non-toxic once cured, uncured UV inks emit mild volatile organic compounds (VOCs) and characteristic resin odors during active curing. Operating the printer in a well-ventilated room is recommended. If you are working in a tight home office or basement studio without direct window access, connecting an inline fume extractor via the rear exhaust port is highly advised.
Q10: Can the xTool O1 Omni print on curved tapered tumblers and glass bottles?
Yes. When paired with the optional OR1 Rotary Attachment, the printer handles tapered, cylindrical, and contoured drinkware (supporting over 90% of standard tumblers and mugs). The built-in Pixel-Scan™ system creates a 1:1 true 3D digital twin preview of your cup in xTool Studio, allowing you to preview texture height and exact design positioning on curved surfaces before printing.